Raucherpause, 1941
Calvin
In the words of Wilbur Smith "War is the game played by old men with the lives of the young". The pawn in this game is the combat soldier, represented by the miniature toy soldier; an insignificant being on the battlefield. Combat is the most intense moment of war, where life and death balances on a knife's edge. The results are terrifying and reveal the worst part of our human nature. Conversely, there are moments when it exudes the best of our human spirit. Most of the miniatures you see here are diligently researched from historical sources and handcrafted between scales of 1/35 to 1/16 (approx 50mm to 120mm). The intricate rendition of human expression and fine details not only demonstrates the level of craftsmanship but also serves as a reminder of the fragile nature of human life. I represent no political bias though my miniature creations. My aim is to portray humanity through the chronicles of military history and thus it is my pleasure that I present to you my weblog Perspectives in Miniature.
In conjunction with AK Interactive, this exclusive Gen 3 acrylic paint set is specially composed with the essential colours that I use to render WWII German Uniforms. It contains 18 colours and a small pamphlet with my personal colour mixes. If you are keen to acquire all the colours on my palette to paint a field grey tunic, a splinter pattern zeltbahn, an oak-leaf pattern smock or the Kharkov anorak, look no further, this is the set for you to get started.
Stop struggling with skin tones. Start painting them. I’ve spent years failing so you don’t have to. This set is the culmination of my experience as a figure painter, distilled into an easy, effective system. With 6 hand-picked 3Gen and Quick Gen colors and my personal technique booklet, you’ll bypass the frustration and go straight to stunning miniatures. Experience the difference and level up your skills today.
I developed this instructional DVD with Model Art magazine to help beginner armor and diorama modelers master the art of the 1/35 scale figure. In this video, I demonstrate easy-to-follow techniques for painting injection-molded plastics—from choosing the right brushes to the 'little tricks' I use for fine details. This is a complete showcase of my personal methods, and I’m confident it will help any modeler take their work to the next level. For your convenience, the DVD is available in both English and Japanese."
This video presentation documents the process of rendering a highly detailed 1/35 scale after-market resin figure. Watch as I take the viewer through the process of rendering of leather, uniform insignia as well as camouflage patterns using the techniques and materials presented in the beginner's guide to achieve convincing results. It is available in both Japanese and English.
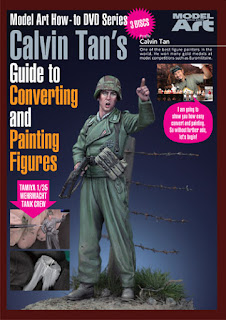
In this third instalment, I will share my techniques and materials to customize and detail an inexpensive stock plastic figure. Watch as I take you through the steps on how I modify a pose, model details such as hands, belts and webbing and insignias. Learn about working effectively with epoxy putty as well as plastic styrene and paper. As a continuation from my first two DVDs, I will demonstrate how to model and paint a simple groundwork as well as an alternate approach using a monochromatic underpainting to render both a field grey tunic and the World War 2 German Splinter Camouflage pattern on a helmet cover. If you have enjoyed and benefitted from those previous titles, this edition will be a welcome addition to your journey in scale figure modelling – regardless of your current skill level. It is my sincere hope that this could inspire you to embark on your own creative adventure in this fantastic hobby.
Clubs / Associations
Calvin
I am going to call this done on this prescient narrative of a Landser perched precariously off the edge of a bombed out rubble during the early stages of the Battle of Stalingrad. I suppose it does reflect the hubris of the Army Group South during the summer of 1942 - and not realising the vulnerable situation they will soon find themselves in the coming months.
As a finishing touch, I decided to incorporate some building features like the street lamp and rain gutter from MiniArt Models. The painting was mainly done with acrylic paint from AK Interactive and Vallejo. For now this might be the closest I can get to making a diorama.
More progress on the painting for the Splinter pattern helmet cover, uniform and rifle. I have also attached the gas mask canister to the figure at the back with a strap made from a strip of paper stiffen with super glue.
I noticed that the details of the 1/35 scale gas canister was lacking in some areas due to the injection moulding process.
For instance, some rows of the recessed lines on the canister's body were missing. To engrave those lines, I first affixed the canister onto a plastic H-beam with Blue-Tac for easy handling.
Some progress on the uniform, insignia and helmet cover this evening. The collar tabs and breast eagle are from the decals that came with the kit. I also decided to remove the chin strap on the helmet cover and add a new one around his face to convey a more "in the field" look.
Cheers,
Calvin
Putting behind the box art assignment from Alpine Miniatures, I resumed work on the Landser over the weekend. I also took the opportunity to try out the Field Grey tone from AK Gen 3 paint for the tunic.
Here is something new I have been working on for the past week after the Star Wars binge builds. I suppose the main play of this project is to use a tall feature to elevate the presentation of the figure to create a vertical composition. How the figure got up there is besides the point; I wanted this to be a metaphor about the vulnerable situation of the German 6th Army group and their impending fall.
The figure is from Tamiya German Infantry Set (Mid-WWII) (Item 35371) embellished with a Hornet head sporting the Splinter camouflage helmet cover. I felt that the body lacked the bulk to compliment the head and thus went about to pad some parts of the trousers and arms with epoxy putty.
The pipes and valve gates are made from sprues, styrene strips and rods. The brick wall is constructed from interlocking various parts of the brick wall set from Hero Hobby Kits. In all 3 sets were used for the wall - with some left over for debris and other future projects. They were textured with a ball burr on a drill - pretty much the same technique used to recreate the cast iron texture on armoured vehicles. Just a few more odds and ends to tie up before I break out the paints.
Cheers,
Calvin
MILITARY ILLUSTRATORS
Where to Makan(Malay for Eat) in Singapore
Calvin Tan Calvin Tan Calvin Tan