Tuesday, 1 November 2022
Sunday, 30 October 2022
Thursday, 27 October 2022
Thursday, 6 October 2022
DIY Title Plates
Here is an economical and efficient way of making title plates for your model displays using the Canon Selphy printer.
The designs are create in Photoshop with the various unit insignia taken from the internet and printed in reverse.
Wednesday, 2 March 2022
Sack Time

Wednesday, 19 May 2021
Experiments with Photo Print Transfers - Day 5
Moved on to a 1/10 scale helmet cover. Frankly speaking, this technique is more suited for larger scale figures as the surface area is much larger and the plastic film does not obscure much of the surface details. Took me only 1 hour from the application of the film to the touch up by brush to attain this current result. Definitely a time saving measure especially when you have a lot of 1/10 scale busts in the storage room ;).
Cheers,
Calvin
Sunday, 16 May 2021
Experiments with Photo Print Transfers - Day 4
Cheers,
Calvin
Saturday, 15 May 2021
Experiments with Photo Print Transfers - Day 3
I was not feeling satisfied with the first attempt which I attributed to my poor decal application skills. There were too many wrinkles to tease out. I therefore threw the figure into a vat of thinner and started over.
This round I took my time and I feel that the results are much neater than the previous attempt. I realised that a big sheet of plastic film is difficult to conform onto a highly wrinkled surface and thus decided to cut the sheet onto smaller pieces and stitch them along the crest of the folds. These conspicuous areas are also very accessible to mend with gloss varnish and paint. Mark Softer from Gunze Sanyo Mr Hobby was used to great effect in softening the plastic film so that it conforms easily to the surface of the figure.
Trimming was done with a color shaper on one hand and a fresh scalpel on the other. This operation requires a great degree of patience and precision. In all, it took me about half an evening and one afternoon to arrive at this stage and I think it looks promising from this point on.
Cheers,
Calvin
Thursday, 13 May 2021
Experiments with Photo Print Transfers - Day 2
Wednesday, 12 May 2021
Experiments with Photo Print Transfers - Day 1
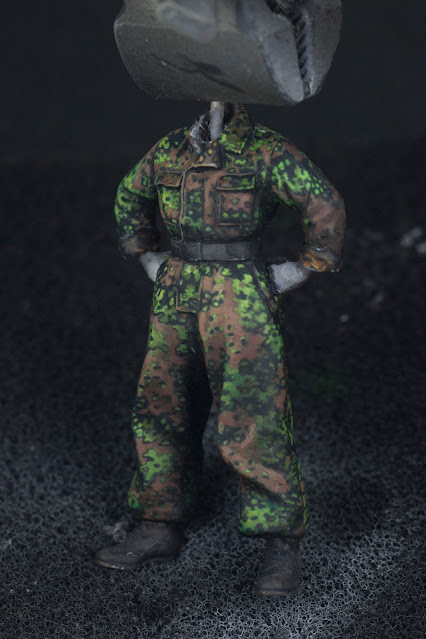
Here is today's results of my experiment using the Canon Selphy photo print transfer. The greatest difficult lies in trying to manoeuvre and fit the film onto the tight corners of the sleeves as well as the pockets on the chest area. Surprisingly a light blast of heat from a heat gun managed to shrink wrap the film onto the figure surface for a tight hug and even so some unwanted wrinkles and tiny air bubbles also appeared. Those need to be rubbed down and repainted. In my opinion, the process is not as fun as painting and there are a lot of kinks on the surface one will need to smooth out for a presentable result.
Cheers,
Calvin
Tuesday, 11 May 2021
Something Is Evolving........
I am in the midst of ironing the kinks of this technique but I am pretty sure the end is in sight...
Friday, 17 February 2012
DIY Decals
The printed cut-out was soaked in water for about an hour to separate the cellophane film from the paper. My deduction proved correct as the print was made onto the cellophane film instead of the paper and thus the Canon Selphy postcard print works exactly like a regular water-slide decal.
The film is positioned with a pair of tweezers and brush and affixed with a water-based gloss varnish from Vallejo. Excess film is trimmed with a scalpel blade and irregularities touched up with silver paint.
The main drawback I conclude is that the CMY print cartridge of the Selphy printer does not print black - making the darkest tones appear as a very dark blue. Needless to mention, CMY printing does not print white - which means that this will have to be filled in by hand. Considering the type of quality for that inexpensive cost of print and the added convenience of doing it from your home computer, I must comment that the result is still rather delightful. Do give this a try and let me know what you guys think.
Until next time...
Calvin


