Monday 27 December 2021
Saturday 25 December 2021
Wednesday 22 December 2021
Das Brot brechen - France 1940
Spent the better half of this morning composing the contents of the cart with various accessories from Miniart to resemble a street blockade. The great thing about multi figure projects is that it allows one to develop people skills ;P
Calvin
Sunday 19 December 2021
Das Brot brechen - France 1940
Not much progress over the week with the exception of the painting of the cognac crates and bottles.
Monday 13 December 2021
Hitting the Bottles Tonight!
Spent the better half of this evening after work to indulge in some "small" beverages from Miniart. I felt that the wood grain on the crates were a tad over done for that scale and thus decided to fill them with some water based modelling putty from AK Interactive. The painting was done with Gen 3 acrylics and weathering pencils also from AK Interactive.
Cheers,
Calvin
Friday 10 December 2021
Das Brot brechen - France 1940
Reshaped the contour of the helmet and sculpted a new hand holding the frying pan. Never mind thinking out of the box; here comes eating out of the pan.
Cheers,Calvin
Tuesday 7 December 2021
Das Brot brechen - France 1940
A little more progress over the weekend.
Rebuilt the Kar 98 ammo pouches and added a zeltbahn sculpted from epoxy putty for the figure seated on the ground.
Cheers,
Calvin
Saturday 27 November 2021
Das Brot brechen - France 1940
A short preview of a vignette with all four figures from the Soldiers at Rest set titled The Breaking Bread/Das Brot brechen. The setting is composed with various accessories like the piano, the garden fence, hessian bags and bottle crates from MiniArt Model and the abandoned cart from MB Model.
Cheers,
Calvin
Thursday 18 November 2021
Verpflegungspause, Unteroffizier, Großdeutschland 1942
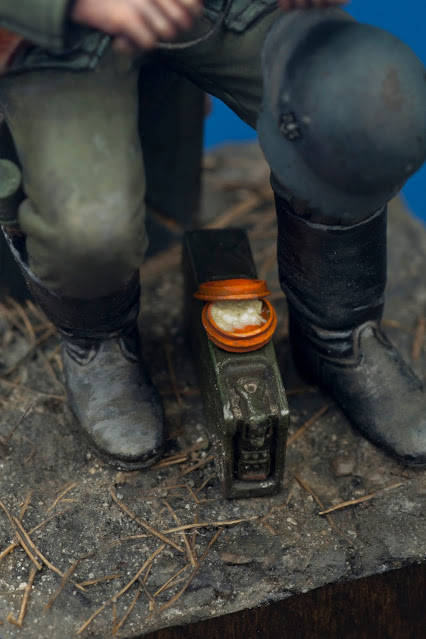
All done on this conversion based on the seating figure from Tamiya's German Soldier's at Rest set. It is painted with AK Interactive Gen 3 paints specifically from my signature set for German Uniforms. And now it is my turn to get a refreshment break :)
Cheers,
Calvin
Tuesday 16 November 2021
Unteroffizier, Großdeutschland 1942 - Painting the Field Grey Tunic - Part 2
In this installment, I will reveal my process of rendering the tunic with a round brush. The brush sizes are 2 for larger areas and 0 for the fine details. I began by painting the highlights on the tunic with a lighter tone created by increasing the proportion of grey green in the base colour mixture. This colour was applied to reinforce the lighter areas revealed from the under painting.
After applying the first highlights, I proceeded to accentuate the shadows and recesses of the uniform with a wash of Rubber Black. I diluted the paint with one part paint to 4 parts AK acrylic thinner instead of water. Unlike water, the AK thinner is more fluid and spreads more evenly; furthermore it prevents the paint from beading and scattering throughout the model's surface.
With the shadow areas darken from the wash, I proceeded to apply a second round of highlights using just Grey Green. This also helps to repair any staining effects caused by the wash onto the previously highlighted areas.
Lastly a third round of highlights colour is applied exclusively to the highpoints with a paint mixture created by adding Flesh Highlight to the base colour.
Once the general tones are applied, I proceeded to outline the pockets and seams of the tunic using a colour mixture of Rubber Black and Dark Prussian Blue. The combination of these two colours create a dark shade that compliments rather nicely with the field grey base colour.
This dark shade is carefully painted into the recessed areas of the tunic with a 0 sized brush.
The collar is undercoated with Black and highlighted with Black Green.
The collar liner (Kragenbinde) and collar piping are undercoated with a colour mixture of White Grey and Grimy Grey.
The painting of the collar liner is further refined and the knife is undercoated with Basalt Grey. The piece of toast on the left hand is given an undercoat of Grimy Grey.
That is all for now. I will be compiling the remainder of the painting process as part of a journal for publication.
Calvin
Thursday 11 November 2021
Unteroffizier, Großdeutschland 1942 - Painting the Field Grey Tunic - Part 1
Labels:
AK Interactive Calvin Tan Signature Set,
Tamiya,
Tamiya - German Soldiers at Rest
Posted by
Calvin Tan
at
14:46
In this instalment, I will reveal my process of utilizing my signature set of colours from AK Interactive to render a Field Grey tunic.
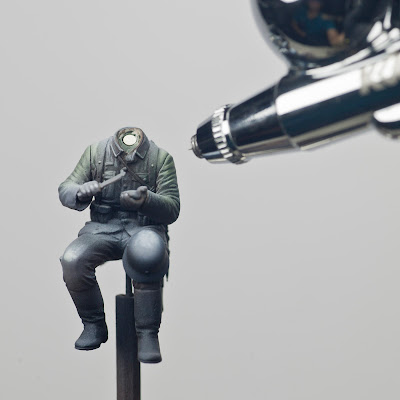
To create a greenish-blue tone of field grey typical in most early war tunics, I will concoct a mixture of Field Grey Base #1, Grey Green and Dark Prussian Blue. Take caution to add only a modicum of Dark Prussian Blue as it is extremely overpowering.
The colours were mixed on a metal surface and the mixture was allowed to dry. Once dried, I added Mr Colour Leveling Thinner 400 to dissolve the paint, rendering it usable for airbrushing.
A flat brush was used to draw the paint from the metal surface and transferred to the airbrush. The dilution rate is a 1:3 paint to thinner ratio.
The high dilution of paint was necessary for two reasons; firstly to allow a smoother discharge of paint from the airbrush nozzle and second being that I only needed a thin veil of paint to cover the surface so that the effects of the underpainting can peep through.
Truth be told, with the exception of Tamiya acrylics, I have never attained good results airbrushing with acrylic paints until most recently using the "Lazarus" method. This opens new possibilities as one could now "resurrect" dried up acrylic paints and reuse them as lacquer-based paint. If you are still sceptical about the results, just look at the following photos and you can see that it boasts a smooth and matt finish.
That is all for now. In the next instalment, I will cover the shading and highlighting of the figure using the brush.
Cheers,
Calvin
Subscribe to:
Posts (Atom)


