Sunday 31 July 2022

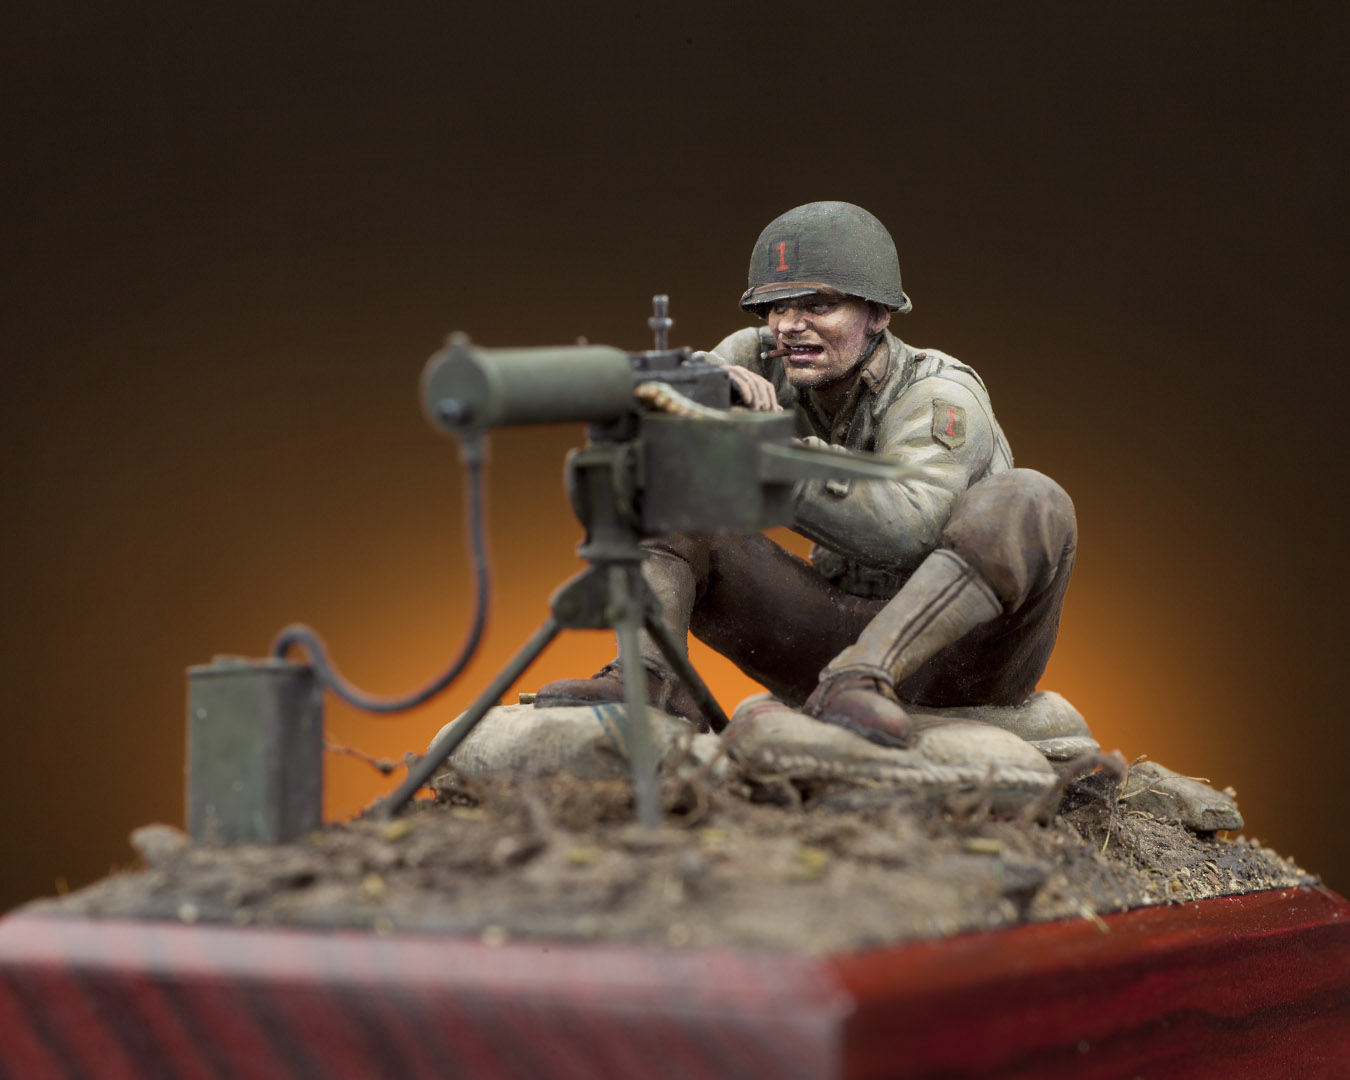
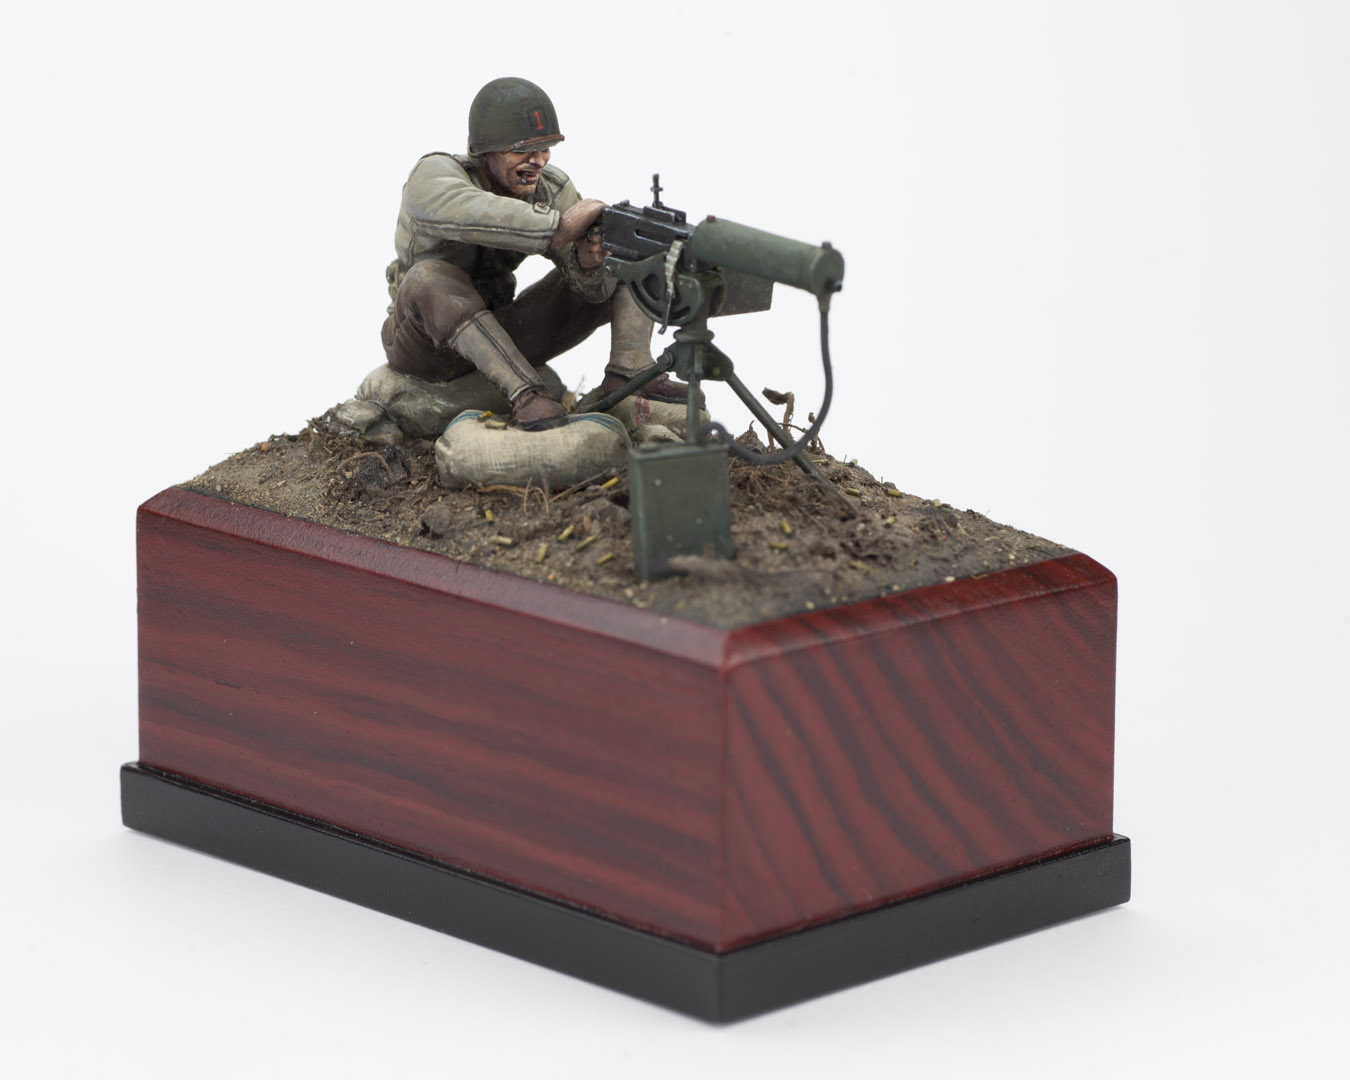
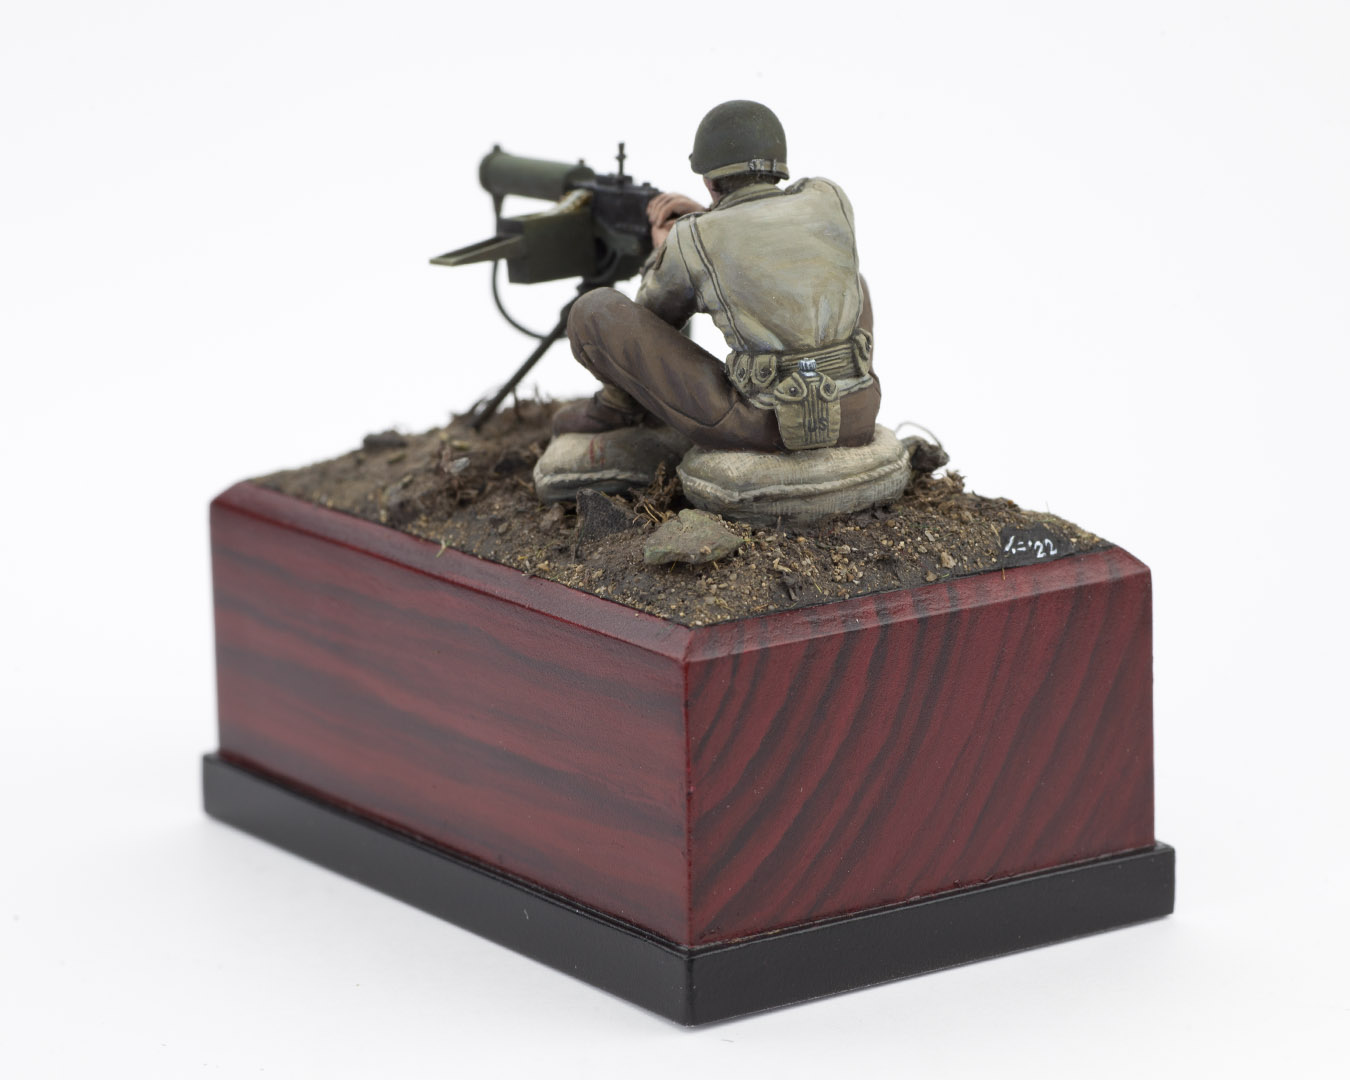
1st Infantry Division - The Big Red One, Operation Husky, Sicily 1943

I took some time off this afternoon to add in the helmet insignia and shoulder patch of the 1st Infantry Division. I also could not resist sprucing up the the water cooled .30 cal Browning MG with a sheet of thinly rolled out Miliput to increase the girth of the barrel sleeve. I also hollowed out the gun cradle with a chisel and a surgical blade. The bolts are 0.25 solder balls flatten against the back of a scalpel blade and attached with AK matt varnish. 

Despite some of the inadequacies compared to some of today's plastic figures in the market, this build was for me another nostalgic indulgence to growing up, watching war movies and building models in the 1980's. Therefore it is of no surprise as to why I eventually choose to represent "The Big Red One" in this piece. 


Cheers,

Calvin


Friday 29 July 2022

A 1970's Throwback

A throw back to the 1970's with this classic figure from Tamiya's US Gun and Mortar Team (MM35086). It is built mainly straight out of the box because I wanted it to be a fun build. The head is stock and I must say it does paint up quite nicely despite the age. However this figure has three major shortcomings. First, the shoulders and hands needed to be repositioned to enable the figure to grab onto the pistol grip of the Browning .30 cal. Second, the figure is also seated too low to have direct line of sight from the Browning MG. I propped it higher by making the figure sit on some sandbags made from Milliput. Third and lastly, the shoes had to be rebuilt as they are too short and narrow. This was accomplished with some Milliput. Finally the figure is painted with Ak's Gen 3 acrylic paints. .  


Cheers,

Calvin


Monday 25 July 2022

1st SS-Aufklärungs-Abteilung LSSAH

Here are some new photos of an old box art assignment painted for Alpine Miniatures back in 2006. 


Cheers,

Calvin


Saturday 23 July 2022

Go For Broke - US 442nd Infantry Regiment, France 1944

It is finally done. 


The moss is from AK Interactive (AK8131) Realistic Dark Green Moss. The mushrooms and pine cones are from HD Models secured onto the base with AK Interactive Matt Varnish (AK11237).


For the final presentation, I used a wooden pedestal from Il Basetta by Franco Serra. The name plate was designed on Photoshop and created using the Canon Selphy photo print transfer method onto a sheet of adhesive foil.
 

Cheers,

Calvin


Friday 22 July 2022

Go For Broke - US 442nd Infantry Regiment, France 1944

 A little more progress today especially with the M1907 rifle sling. This was particularly tricky as I needed to punch the eyelets along the length of the straps and achieve a natural sag of the sling. After some experimentation with paper and epoxy putty, I decided to use rolled sheets of epoxy putty. Epoxy putty can be easily shaped with a wet brush to achieve the natural sag and attaches easily to any surface with PVA glue. The main drawback is that its structure is very delicate and breaks easily with the slightest touch. My solution is to paint both the front and back of the thinly rolled sheet of epoxy putty with AK 11419 Waffen Red Brown. This gives it a thin vinyl shell to preserve the shape and acts like an exoskeleton to fortify the structure of the putty. I am therefore able to punch the holes through the putty's surface without breaking up the putty. Furthermore the skin of paint prevents the putty from adhering to each other - removing another headache in the process. 


Cheers,

Calvin


Wednesday 20 July 2022

Go For Broke - US 442nd Infantry Regiment, France 1944

Some progress on the figure this evening. The shoelaces are made from Black Milliput and added on after the shoes were painted. 


Cheers,

Calvin


Monday 18 July 2022

Go For Broke - US 442nd Infantry Regiment, France 1944

Modelling the US 442nd Infantry Regiment has always been at the top of my wish list and I can now finally claim that I have done so all thanks to the new US Infantry Scout Set (355379) from Tamiya. All it simply took was literally some plastic surgery to transplant the faces from Tamiya's Japanese Army Officer Set (35341) and voila! 


The face transplant was seamlessly performed with some careful cutting and "welding" with Tamiya  Plastic Cement and Extra Thin Quick Setting Cement. 


Cheers,

Calvin