Showing posts with label Tests with Fimo Deco Gel. Show all posts

Sunday, 23 December 2007

Season's Greetings and One Year On....

o
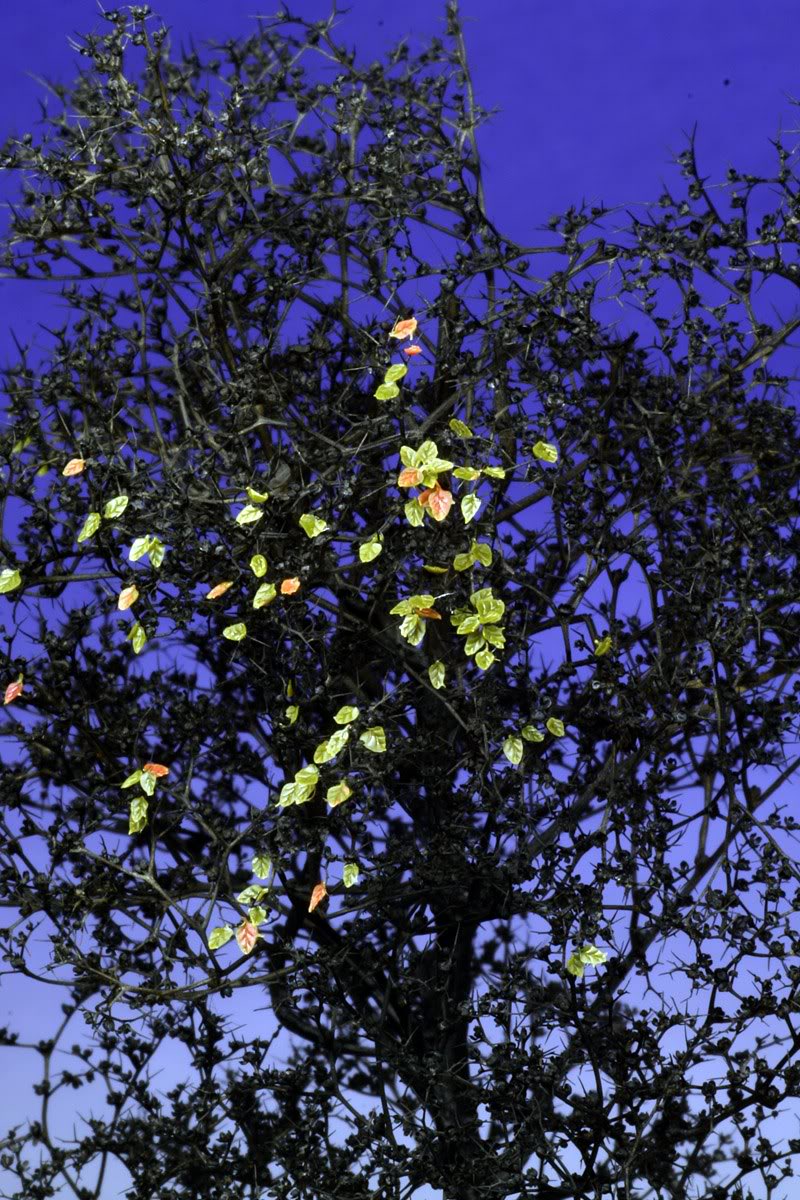
Wow! it did not occur that this blog has been going on for a year now. It has been really fun and encouraging to receive many positive responses and queries about my works and techniques (especially the one about the Fimo Deko Gel). So just to kick up a notch from the small clump of undergrowth from base of the SS Deutschland figure I though why not make a hedgerow during this festive lull based on the techniques described HERE .


Dried sea-foam weed was used as a base to construct the hedge. The texture of the stem is re-created with a thick coating of Gesso primer(type used by artists to prime their canvases)


The sea-foam weed is undercoated with flat black applied with an airbrush.


The individual leaves are carefully attached on to the sea-foam with superglue (yes I know, it's crazy)


Got a little cross-eyed when I took this picture.


Three days old and there's still a lot of bald spots to cover. Thought it does not look like a Christmas tree but it will have to do for me. So here's wishing everyone and all a Merry Christmas and a Happy New Year!

Calvin


Monday, 3 December 2007

More Adventures in 1/35 Scale Garderning

o
Spent the last weekend tidying up the sloppy paintwork on the figure as well as rearranging the botanical arrangement of the groundwork. Spent the whole Sunday afternoon individually attaching the Fimo Deko Gel leaves to recreate the low lying shrubs. My only comfort is that I don't have to do this under the blazing sun. I'm pretty satisfied with the results for now and should be back working on the figure this week. Maybe someday I'll use this tedious method to recreate a section of the Normany bocage!


Calvin


Friday, 12 October 2007

Moving on to Autumn...

o


The current set-up at my workbench. Picked up a small piece of sponge to make the dabbing process quicker. As you can see, it's pretty addictive.
SS Deutschland figure is still untouched; surrounded with the newly "grown" undergrowth. I will probably have to resume work on it this weekend.

Calvin


Thursday, 11 October 2007

Lets Kick It Up A Notch.


I managed to haul out my collection of photo-etched vegetation to make more varieties of plant life with the Fimo Deco Gel. Did not get anything done on the SS Deutschland figure but rather spent the greather part of the afternoon attaching individual Fimo Deco Gel leaves onto a dried weed root stiffen with Fimo Deco Gel thinned with cellulose thinner. I'm guessing this will come pretty handy in any future Normandy hedgerow scenes.


Close-up of the bush.
 
Calvin


Wednesday, 10 October 2007

Making Leafs with Fimo Deco Gel


Fimo Deco Gel is dyed with an oil paint mix of Ivory Black, Yellow Ochre and Prussian Blue.


The gel is painted over the photo-etched leaves. Surface tension of the gel helps to contain the shape of the leafs.


The gel is baked with a heat gun to cure to a rubbery hard finish. It's then peeled off from the photo-etched fret with a scalpel blade.
Close-up of the reproduced leaf.


..and now the clones are ready!


Attach the leafs to a dried weed root with super glue. You may apply some heat from the heat gun to curl the corners of the cured polymer gel and after that it is ready for paint.


Calvin


Friday, 28 September 2007

Thursday, 27 September 2007

Alte Kampfer - Webbing Details


Today's progress on the webbing details. I'm also experimenting around with Fimo Decorating Gel (dyed with Payne's Grey oil paint) to make castings of the axillary straps as well as insignias. More of that to come soon....
Anyway, it has dawned upon me that Polymer Clays might herald a new age of sculpting military miniatures as was when acrylics were introduced to figure painters. Now, coming from my experience as an extensive user of epoxy putty, I admit that I'm gradually drifting toward this new medium. (Did I also mention that Raul LaTorre is also using Fimo for his recent sculpts as well? Not that I'm a copy cat that is ;P) The significant plus side of polymer clay is definately their working time. One could continually manipulate around with the forms to their satisfaction before sending it to the oven (heat gun in my case) to be baked hard. Another particular attribute to this medium is that it registers impressions much clearer instead of epoxy putty which have a tendency of producing beveled edges when impressed upon.
Feathering is also a problem with epoxy putty (or at least for the brand that I'm using) especially when it get a little firm; which is especially frustrating when one desires to re-work an area.
Based on my experience, once the epoxy putty is kneaded, it will undergo a gradual process of curing. Whilst freshly kneaded, it feathers well but too soft for modelling. About and hour old, it gets slightly firmer, which is great for modelling as it registers impressions better. Two hours old, it gets leathery hard (almost like firmness of an rubber eraser) and it's great for slicing to attain really sharp details. (you'll need afresh blade for this if you'll run a risk of tearing the clay)
From my review, Polymer clays do not however have such temperaments for modelling but perhaps will pose some difficulty to one who is more accustomed to carving instead of modeling. And perhaps the best part I love about this clay is that there's minimal waste and chances are you'll likely to use up every single bit of it from the box!
One more thing which I think will appeal to all the impatient modellers out there; the clay takes less than a minute to harden under a heat gun too!

cheers,

Calvin